Showing posts with label Paper. Show all posts

Friday, December 17, 2010

Funky DIY Wreaths

I always told myself that the moment I started making WREATHS, I was an old fart.  Well, it looks like I finally made it to "old-fartdom" cause I've gone and done it. TWICE.  I must say, however, that no matter how many wreaths I make, I refuse to keep them like a pack rat.  You know what I'm talking about - think suburban queen who sets aside entire rooms for holiday decorations.  That will never be me.   This past Halloween, I'd found a straw wreath shape at Hobby Lobby, covered the sucker in a sickly looking green yarn (which takes about 1.5 episodes of Grey's Anatomy to do, if you were wondering) , and hot glued a haunting magnolia and other various subtly creepy things.  It served me well.


So then, it's not Halloween anymore.  So  what about this creepy little thing on my front door that looks like it belongs on some poor sap's casket? We do a this:

For the flowers I used brown coffee filters, tissue paper from a couple early Christmas presents I got this year, that magnolia from the last wreath, and some paper towels, which I am convinced look exactly like fabric when made into rosettes.

I colored the paper and magnolia with a wash of coral colored paint to match my Cupcake Paper Garland,

I'd never made tissue paper flowers before, so I improvised.  If you're interested, here's a fun technique: Peaches' Coffee Filter Flowers  I also didn't have any hot glue in the house, so you're looking at a feat of staples and string.  I'm MacGyver.

All of this - under $2.  Free if you're already stocked with these kitchen necessities ;)


In my search for wreath ideas, I came across some really fun ones I'd like to share with you if you're thinking of also becoming an old fart like me and feel like creating a wreath of your own! 

Merry Christmas!

Femina Girls

Living with Lindsay
Linda Made
Dana Barbieri
Take Heart
Pickles
Rock Scissor Paper
Craftapalooza
Kenneth Wingard
This Old House
Vintage Indie

Sunday, December 12, 2010

Bridal Shower by Jessica H.

The Bride.
My beautiful friend Imogen is off the market.  (sorry boys!)  To celebrate, my other equally lovely friends, Jessica and Katherine, threw her a dazzling DIY bridal shower in the courtyard of Jessica's complex.  I loved it so much, I just couldn't keep it to myself.
click for larger view


I don't know how they did it, but they managed to dangle strings of Christmas lights and globe lanterns from the high perches of the dinner space.  We dined under the stars.


The color palate was clean and sophisticated.  I'm such a sucker for shades of Tiffany blue and coral.  After apparently chugging a supply of apple juice that could quench an small army, they painted the inside of small Mott's bottles with enamel paint.  FYI, enamel is excellent for such jobs, as acrylic will lift when water comes in contact with it.  Some well selected pink carnations and voila - an economic centerpiece that looks like a million bucks.

Baskets filled with antique roses and lunch bag lanterns helped define the parameters of the space as well as add a little romantic whimsy to the atmosphere.

Lunch Bag Lantern How-To
1.) Find white paper lunch bags at your local grocer.  Any color will do, just make sure the paper is thin enough to allow for light to bleed through.                                             2.) With a craft punch (scrapbook or stationary isle), punch a series of shapes into the upper lip of the bag.  Take care to punch them upside down, as you will then flip the lip around the top to create a "hem" around the lantern.                                              3.) Pop in an LED candle as the light source.  I try not to use real candles during parties.  Wine + fire does not mix well.


Playing a game of "Who Said It?".

Gettin' it.
Jessica has awesome taste in home decor.
I love Jessica's coffee table.


Tuesday, December 7, 2010

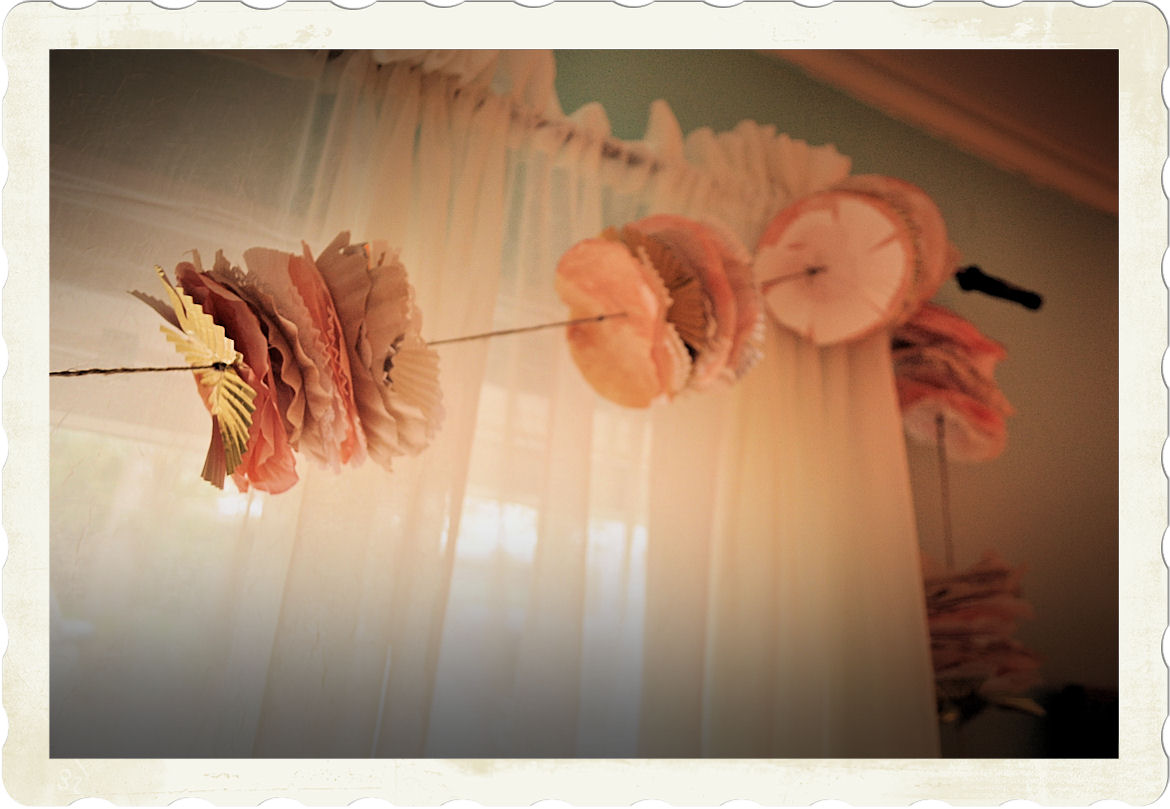
Cupcake Paper Garland


I have way too many cupcake wrappers in my "pantry" (cubby).  If there were a top five list of things people buy too much of, thinking they probably don't have it at home, mine would go as follows:

Butter.  If I were to die tomorrow, people would find this terribly embarrassing butter stash of mine, and probably think I had some sort of weird butter fetish.  Sounds like a cookie escapade is in order...a girl's gotta have some dignity.
Scissors.  Upon gutting my house during a freak cleaning extravaganza, I have discovered I am the proud owner of FIVE pair.
Lighters.  Which, I believe, has been the main culprit for my candle obsession.  Or perhaps it's the other way around - it's a "chicken or the egg" type situation.
Christmas Lights.  They're good for everything, and I want to put them to good use...but I'm beginning to look like an eccentric undergraduate student with all this bling.
 Cupcake Wrappers.  I mean, when you go on an impulsive cupcake adventure, you always want to "make sure" you've got enough for your endeavors, right?  This gets to be a problem...

So I did a little research in an effort to figure out how I could make good use of these bad boys, and upon stumbling across two wonderful blogs by Creature Comforts  and Pam Garrison, I was inspired.

I found these tiny paper doilies in Hobby Lobby's cake section.


Cut some slits in some for a little added texture.

I love how coral and robin's egg blue look together.

Cut down some brown coffee filters or pattern paper for an antique touch.


How-To:

Mi Madre in the background :)

Collect any color of cupcake wrappers you like.  As I try to do things the Cheap-o way, I grabbed some shinies and some lacies, but used white ones for the coral colored pieces.  Get yourself some paint.  It goes such a long way.  I can't tell you how many times I've busted them out in a pinch.  Poke holes in the middle of the wrappers.  I found a kebab stick to work just fine for me!


A little watercolor 101.  I hate watercolors.  I'm not a big fan of oil paint either.  I am, however, madly in love with acrylic paint.  Why?  It's water based and can be thinned out with exactly that. Not to mention, I'm a total klutz, and if you give me something to ruin my clothes/furniture/life with, I will.  Get yourself a color wheel.  Learn it, memorize it.  You will find you need only 6 paint colors to get WHATEVER color you want.
They are: Red, Blue, Yellow, White, Black, Brown.
If you're in Austin, go to Jerry's Artarama for some killer deals on paint.


Red + Yellow = Orange
Red + Blue = Purple
Yellow + Blue = Green
All together = Brown

White + Anything will Lighten
Black + Anything will Darken

For a coral color, I mixed :
(1/4)Red+(2/4)Yellow+(1/4)White
(For this effect, use lots of water to dilute the color)

Either bake or microwave the wrappers for quick drying and an aged finish, but please...don't put tin foil in the microwave. 

String 'em up on some twine, tying some knots between the clusters for that "piecey" appearance.

Congratulations.  You have made yourself that much more cupcake wrapper light.  Enjoy!  And take care to brag about how you just made something for under $3 (or free if you hoard, of course) that looks like you bought it from Whole Earth Provisions for whatever silly amount they're asking for this Christmas season!  Happy Crafting!